Note: Use at your own risk. Be ethical about usage. Further, I am not a professional programmer/developer.
How to build your own AI-Influencer using stable difussion
Want to use AI to generate images or build your own influencer but dont want to pay for Midjourney etc.? Dont worry, there are open source solution and I will show you how simple it is to use one of them.
I am using Automatic1111 because its free, esy to use and with some modification you can also use it with nearly every GPU (> 8 GB). For other stable diffusion UIs you often need NVIDIA GPU.
Requirements before
First, make sure Python 3.10.6 is installed (https://www.python.org/downloads/release/python-3106/).
IMPORTANT: Newer versions are not supported + In the installation process you need to click on ‘Add Python to PATH’.
Second, you need to install GIT (https://git-scm.com/download/win).
Download stable diffusion repo (and check for updates)
Create an empthy folder (e.g. called WEB UI) on your harddrive. Navigate to this emtpy folder to clone the repo to it. Then click in the upper path area and type ‘cmd’ Next you paste the following link and hit enter. The repo is then downloaded automatically.
git clone https://github.com/AUTOMATIC1111/stable-diffusion-webui.git
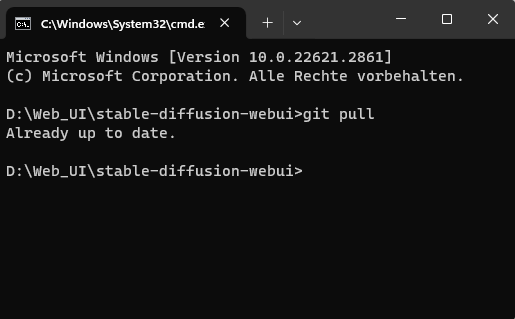
If you want to check for new updates (recom if something doesnt work anymore), you go into the ‘stable-diffusion-webui’ folder and type ‘git pull’ into the cmd (same principle as the ‘clone’ command).
First start
Next you run the ‘webui-user’ from windows explorer by double clicking.

After the first start all dependencies etc. will be installed. This will take some time. Also a base model/checkpoint called ‘v1-5-pruned-emaonly’ will be downloaded. So you are basically set up to create your first images with stable diffusion.
Configure webui-user.bat
In some cases (too little system resources), you can configurate the command line and tell the stable diffusion to use less resources. Here you will find all possible configuration options you can choose from: https://github.com/AUTOMATIC1111/stable-diffusion-webui/wiki/Command-Line-Arguments-and-Settings#environment-variables
For weak GPUs maybe ‘–lowvram’ is necessary. This increases the processing time a lot. In order to lower the Vram usage you can also try ‘–xformers’. For my system (16GB VRAM and Intel XE Iris onboard (i know pretty crap)), the following command line works perfectly fine.
set COMMANDLINE_ARGS= --medvram --skip-torch-cuda-test --precision full --no-half
If you want to configure the commandline arguments, right-click on the webui-user.bat and ‘edit’ it.
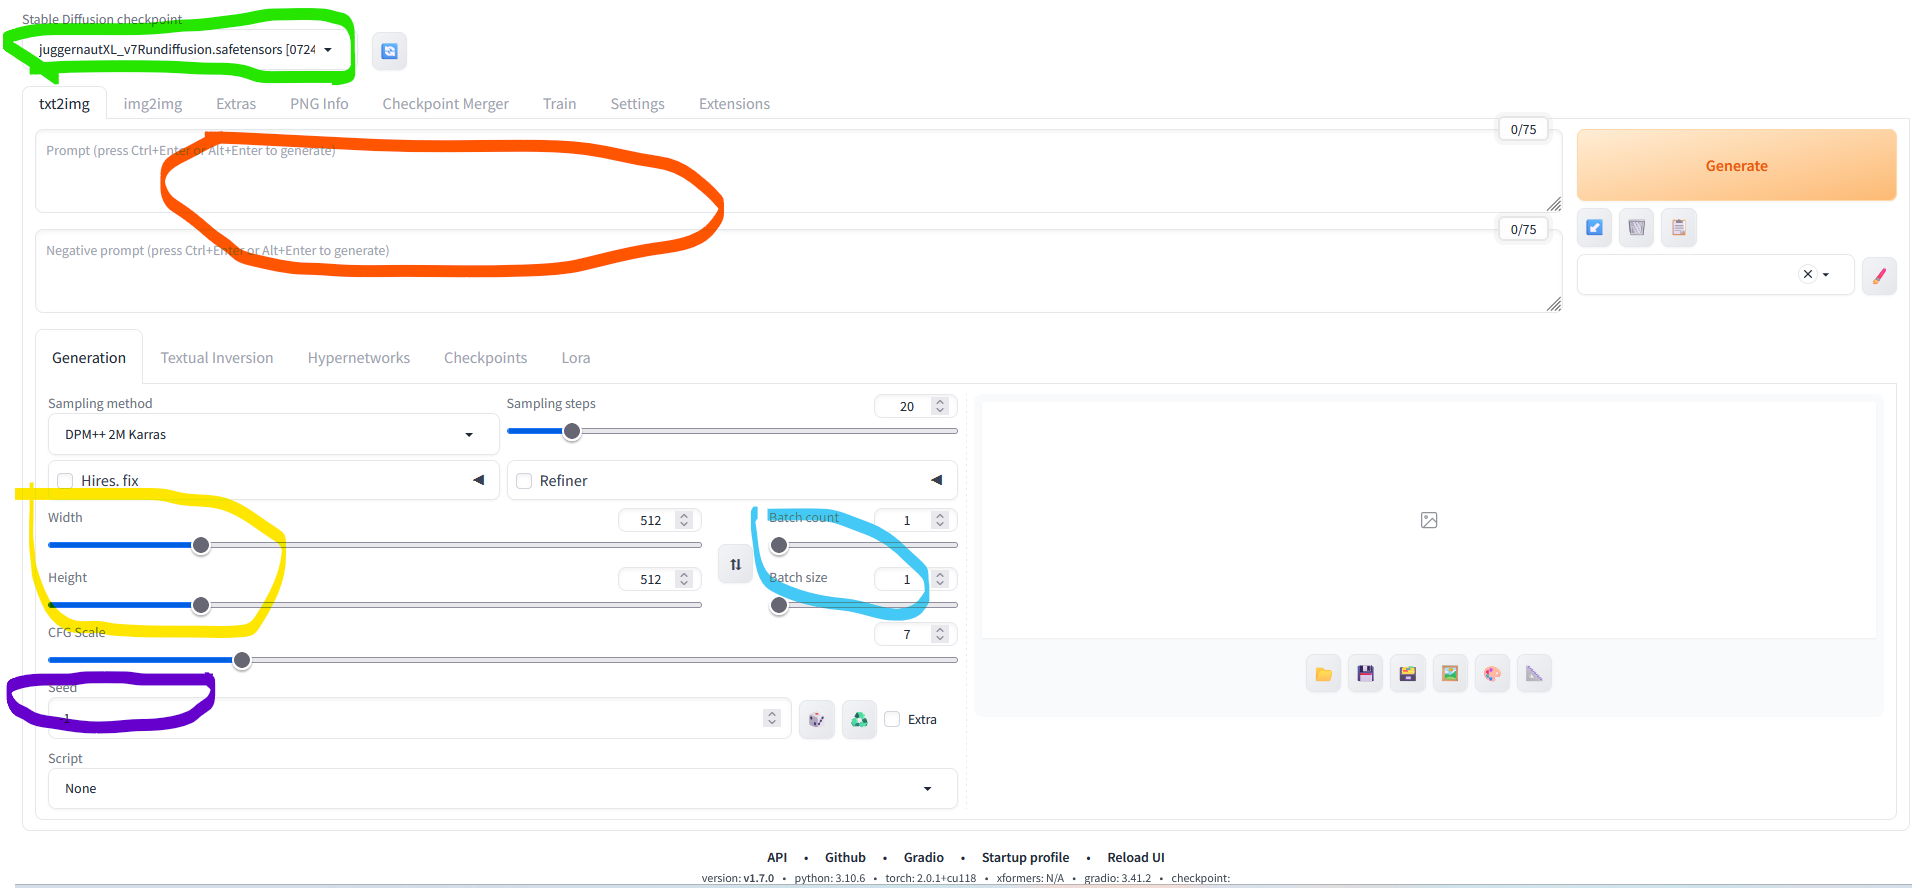
General User Interface (GUI; local)
Here you can see the GUI of Automatic1111. I will just highlight the basic functions and options. The rest you can explore on your own ;)
- You can choose the model (green circle)
- The red circle marks where you can put in positive prompts (what you want) and negative prompts (what you want to avoid)
- You can choose the batch size (blue circle)
- You can choose the size of the image (yellow circle)
- You should set a seed if you want to recreate a similar picture (purple circle)
- You start image generation by clicking on 'Generate'
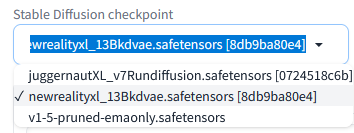
Download other checkpoints
The base model downloaded when you first start stable diffusion is ok but you soon will want to go for better ones. You can find them online. One nice option is https://civitai.com/models. Here you can download different models/checkpoints for different purposes for free. You just click on download. After downloading you have to add the checkpoint into the right folder (stable-diffusion-webui\models\Stable-diffusion).
After putting the models into the right folder you can choose them after starting webui-user. (I downloaded the two checkpoint ‘Juggernaut’ and ‘Newreality’)
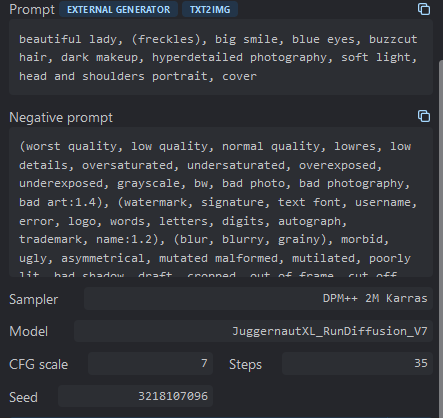
Prompting (pos/neg)
Positive prompts are the things you want in an image (e.g. blue eyes).
Negative prompts are thins you want to avoid in an image (e.g. oversaturated or ugly).
The cool thing about civitai is that if you click on a picture of a checkpoint (e.g. https://civitai.com/images/3962887) the used settings are shown. So you can copy and paste the negative prompts to improve your generation easily. And reading through different pos. prompts will help you to improve your own prompting.
First try on my own
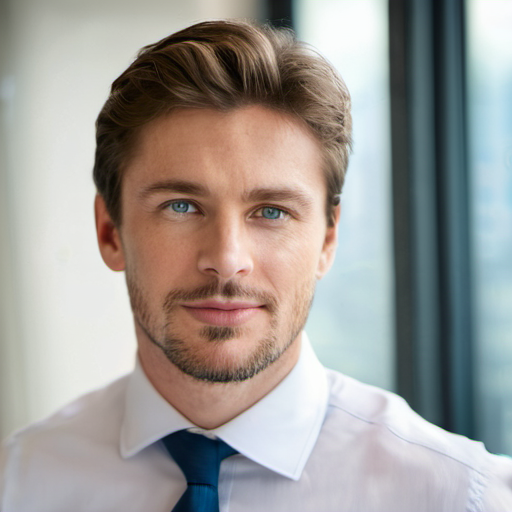
For my first try I wanted to create a male business influencer using the juggernaut checkpoint. Here is what I tried.
- Positive prompt: Business man, handsome, office, portrait, brown hair, blue eyes, down-to-earth, elegant, sharp focus, soft lighting, vibrant colors, hyperdetailed photography
- Negative prompt: disfigured, ugly, oversaturated, low quality, bad eyes
- Seed: random (-1)
And here is the result. Except for a little bit of weirdness in the eye region I would say quite impressive.
Troubleshooting and some more examples
Also in the repo you can finde some more advice about troubleshooting. Check you this info: https://github.com/AUTOMATIC1111/stable-diffusion-webui/wiki/Troubleshooting
And here are some more examples using the newreality checkpoint:
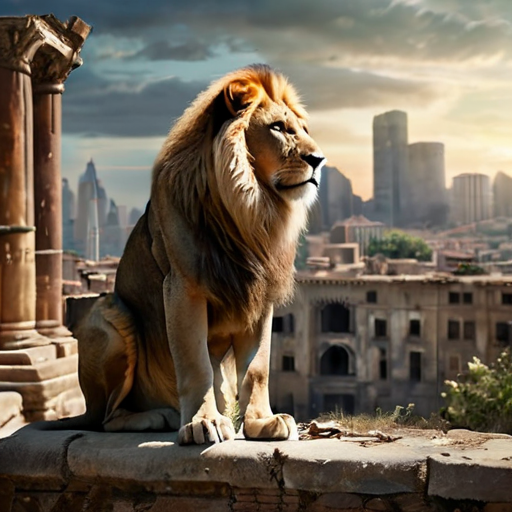
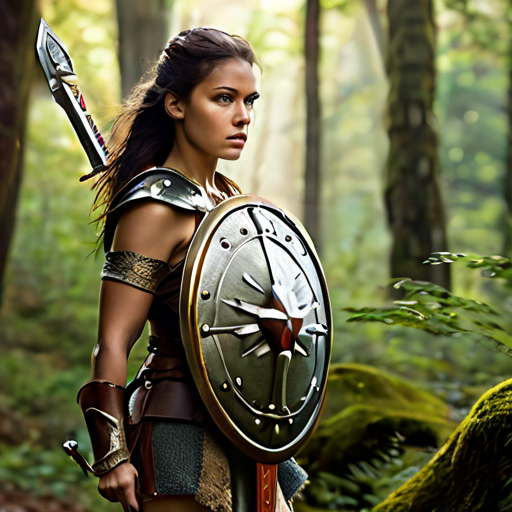
I know those still have some issues and can be fine tuned but I just wanted to showcase how easy you can generate images and your own AI Influencer using A1111. Its for sure a powerful tool.
Try it yourself and happy prompting/generating! :)
This project is inspired by https://www.youtube.com/watch?v=ky5ZB-mqZKM.